X-Wing: Vidla Crucible

One more race without a winner at the Vidle Crucible

The Densis Rift   claim the toll of 3! That’s wright! 3! 3 pilots were lost for the wretched warp hole!

The last 2 racers…simple couldn’t withstand such a carnage that refuse to complete the circuit fearing the murderous rift!

Once again…no one survive the DENSIS RIFT!

Tha “Sponsors”
Starviper

 A-Wing

E-Wing

M3-A Interceptor

3xTie-Fighter
2_Starviper na frente

Starting at the Pole Position, the Starviper jump head of the remaining competitors

20151020_220259

20151020_221116

At the first turning point, the Starviper closes in, keeping a comfortable advantage over the Tie-Racers

20151020_221204

Ups!…Some pilots simple don’t what is needed to run in such a competitive championship

20151020_224140

Plan B. Blazing Guns!

20151020_225424

Starviper way ahead…for now…

20151020_232021

The Rift and his victims! A starviper, a Tie-Racer and an A-Wing being pull through the dreadful breach.

No prize for you!

Cheers,
Sapo

X-Wing: Evacuation of Hoth – Blockade Runner (Mission II)

As the invasion rages on below, the GR75 escapes into orbit and plunges headfirst into the imperial blockade.

 “Stand by, Ion Control…Fire.”
―Toryn Farr

Imperial forces scramble to intercept the transport before it passes beyond the range of the merciless salvo of turbolasers.With the help of Hoth’s planetary ion cannon, however, the Rebel forces may be able to punch through the blockade and make the jump to hyperspace.

 “As the Rebels fled, the 501st gathered around a burning bunker, and let out a cheer that shook the stars. The Rebellion was done.”
―Retired clone trooper

The Rebel starships must survive wave after wave of Imperial fighters that make their way from the blockading Star Destroyers to engage the Rebel forces. As the Rebels continue along their flight path, their battle with the Imperial ships is punctuated by shots from planetary ion cannons and nearby Star Destroyers raining down turbolaser and ion blasts.

Rebels won the first encounter.

Following the campaigns rules, all surviving rebel unique ships (Wedge Antilles and Aire Cracken) may be equipped with a free upgrade for free (up to 5pts).
Each rebel unique ships destroyed (Biggs and Lt Blount) should be replaced by non unique ships of the same type and lowest squad point cost. So a X-Wing Rookie Pilot and a Z-95 Bandit.
The GR75 foi was heavily damaged and will start the game with a “Minor Hull Breach” damage card.
The Rebels players may see the next mission Imperial squadron.

The Galactic Empire:

Tie Interceptor Carnor Jax, Push the Limit

Tie Interceptor Saber Squadron, Push the Limit

Tie Interceptor Saber Squadron, Push the Limit

Tie Bomber Captain Jonus, Push the Limit, Ion Torpedo, Proton Rocket

Tie Bomber Scimitar Squadron, Fletchette Torpedos, Proton Rockets

Tie Bomber Scimitar Squadron, Fletchette Torpedos, Proton Rockets

Tie Fighter “Mauler Mithel”, Outmaneuver

Tie Fighter Black Squadron

Tie Fighter Black Squadron

The Rebel Alliance:

GR-75 Combat Retrofit; Bright Hope, Tibanna Gas Supplies ; Back UpShield Generator;  Chewbacca,

X-Wing Wedge Antilles, R2, Push the Limit

X-Wing Garven Dreis;

B-Wing Nera Dantels, Ad. Sensors, 2xFletchette Torpedoes

Z-95 Airen Cracken,

Rebel Objective: The GR-75 must survive  after8 turns

Empire Objective: Destroy the GR-75


And once again, Heavily cripple, the transport ship slowly lumbers…escaping the grip of Emperor and his minions.

Rebel Victory

X-Wing: Red Vs Black

 “All wings report in. — Red Ten standing by. — Red Seven standing by. — Red Three standing by. — Red Six standing by. — Red Nine standing by. — Red Two standing by. — Red Eleven standing by. — Red Five standing by.”


RED SQUADRON

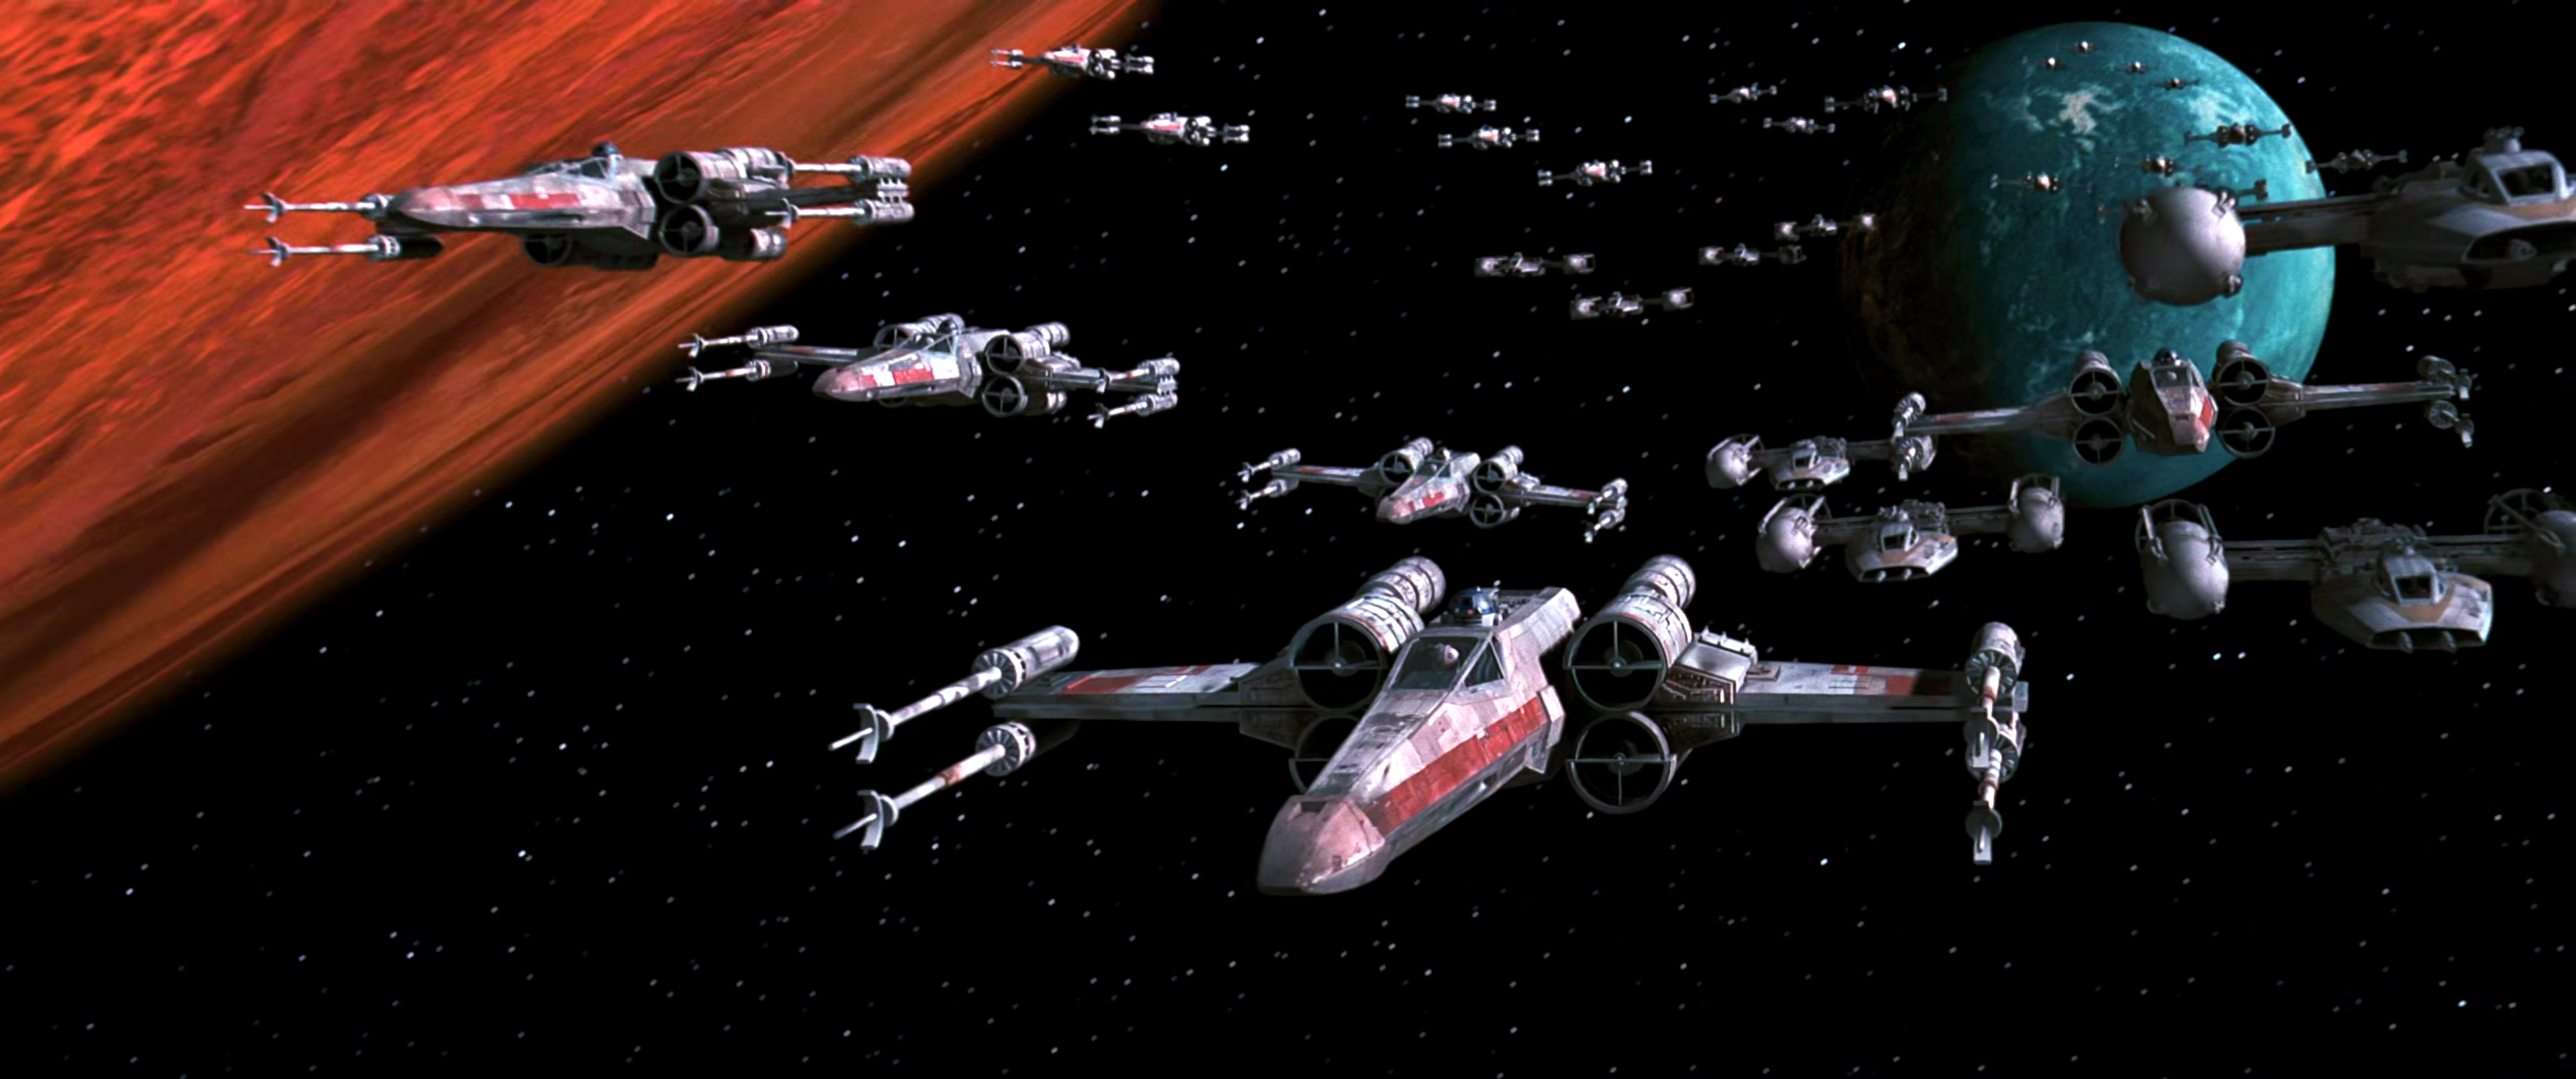
Red Squadron was an Alliance Starfighter Corps X-wing squadron active during the Galactic Civil War. The squadron most famously fought at the Battle of Yavin and Battle of Endor

Red Squadron was stationed aboard the Mon Calamari Star Cruiser Independence during the build up to the Battle of Yavin. Pilots who flew with the squadron included Lieutenant Hamo Blastwell, Keyan Farlander, Samuel Raider and Puck Naeco. Many members were transferred to Yavin Base and reassigned to different squadrons for the Death Star assault.

Red Squadron was cobbled together from pilots from the Dantooine Squadron, the Ecliptic Evaders, and the Tierfon Yellow Aces for the assault on the Death Star. During the battle, Red Squadron gained the distinction of being the unit that brought down the Death Star’s defenses as well as ultimately destroying the station itself. But the victory came at a price. Almost the entire squadron was destroyed, except for two X-wings flown by Luke Skywalker and Wedge Antilles.

Red Squadron Pilots:

Wedge Antilles — X-Wing

Luke Skywalker — X-Wing

Jek Porkins — X-Wing

Biggs Darklighter — X-Wing

Garven Dreis — X-Wing

Red Squadron Pilot — X-Wing

Red Squadron Pilot — X-Wing

Total: 180pts


BLACK SQUADRON

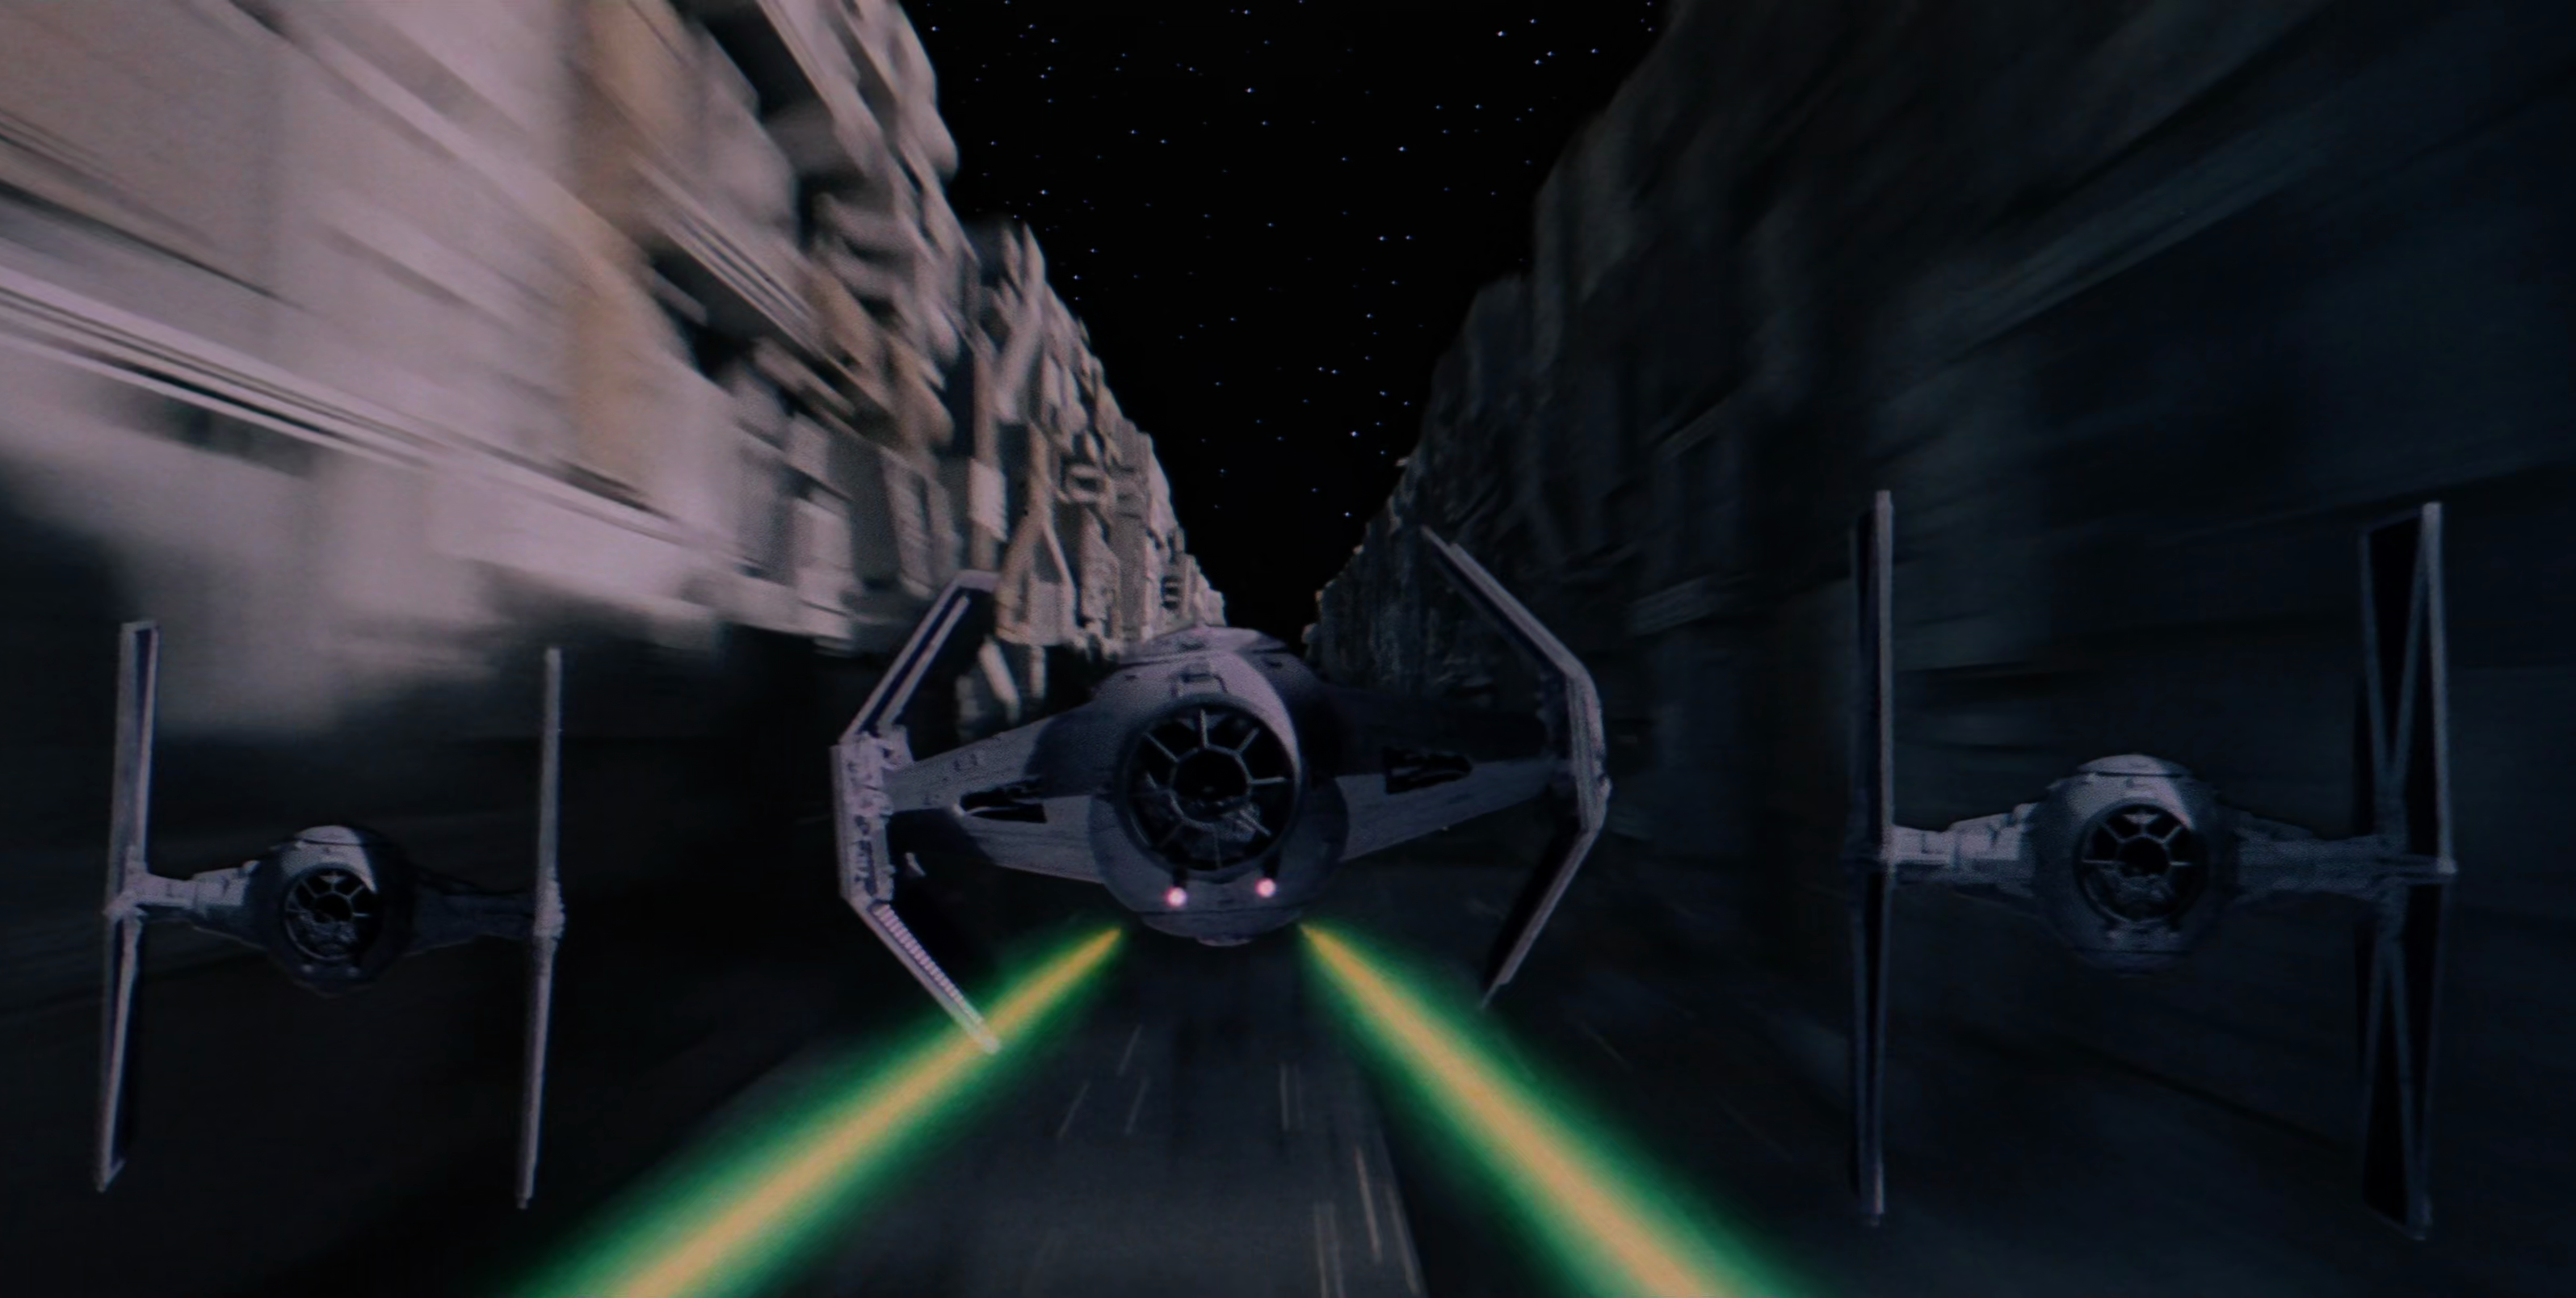
Stationed aboard the first Death Star during the Battle of Yavin, Black Squadron was the TIE unit which Vader led into battle against the attacking Rebel snubfighters—the only TIE unit to deploy against the Rebels during the battle. As Moff Tarkin and most of the rest of the Death Star’s chain of command refused to take the threat the Rebellion posed seriously, only the squadron that Vader personally commanded launched—fortunately for the Alliance, as the giant station carried several thousand TIEs that would have easily overwhelmed the few dozen snubfighters the Rebels managed to throw against it. An element of six TIEs attacked the X-wings providing top cover, while Vader himself and two wing guards engaged the ships making the trench run. It is not often appreciated these TIE pilots were significantly outnumbered during the battle, but the members of Black Squadron were among the finest the Empire had to offer: they fought hard, and were responsible for many of the Alliance casualties.

Black Squadron Pilots:

Darth Vader — TIE Advanced

“Mauler Mithel” — TIE Fighter

“Backstabber” — TIE Fighter

“Dark Curse” — TIE Fighter

Black Squadron 5 — TIE Fighter

Black Squadron 6— TIE Fighter

Black Squadron 7 — TIE Fighter

Black Squadron 8— TIE Fighter

Black Squadron 9 — TIE Fighter

Black Squadron 10 — TIE Fighter

Omicron Group Pilot — Lambda-Class Shuttle    21

Total: 183pts


Play Area: 4’x6′, 12 asteroids

200pt Squadron (ALL listed Pilots + upgrades

X-Wing: The Point of no Return – Minefiled

“I assure you, Lord Vader. My men are working as fast as they can.” “…Perhaps I can find new ways to motivate them.”

Having joined the forces of the Rebel Alliance, the CR90 “Tie Trasher” must navigate an Imperial mining operation to deliver the transmission and Tibanna Gas to the rebels base.

The Rebelds:

  • CR90
    • Fore Section:
      • 2 x Single Turbo Lasers
      • 1 x Gunnery Team
      • 1 x Sensor Team
    • Aft Section
      • 1 x Quad Laser Cannon
      • 1 x Engineering Team
      • Tibanna Gas Supplies
    • Han Solo
    • Weapon Engineer
    • Backup Shield Generator
  • Ethan A’bath
  • 2 x B-Wing Blue Squadron
  • 2 x Z-95 Bandit Squadron

The Galactic Empire:

  • Scimitar Squadron Pilot, Proton Torpedoes
  • Gamma Squadron Pilot, Proton Torpedoes
  • Captain Jonus, Proton Torpedoes
  • Maarek Stele, Assault Missiles
  • Black Squadron Pilot , Veteran Instincts
  • Black Squadron Pilot , Veteran Instincts
  • Royal Guard Pilot
  • Academy Pilot
  • Academy Pilot
  • Academy Pilot
  • “Mauler Mithel”, Swarm Tactics
  • “Dark Curse”
  • “Night Beast”

For the Rebels: The CR90 flees off the Imperial table edge.

For the Galactic Empire: Destory the CR90

At the last minute, the CR90 reach the Imperial table edge, pursued by 8 Imperial ships.

This was truly a EPIC FINAL!

And the Rebels won!…Once again!


This was a initiation campaign for most guys at the club. I tried to grab their attention first with small games and later with the “cinematic experience” of Tantive IV Expansion Set.

It worked! Most of the guys got hooked! 😀

NEXT WEEK: Red Vs Black

All wings report in. — Red Ten standing by. — Red Seven standing by. — Red Three standing by. — Red Six standing by. — Red Nine standing by. — Red Two standing by. — Red Eleven standing by. — Red Five standing by.

X-Wing: The Point of no Return – Satellite Uplink

“Kicking Empire Galacti Arse is easy! Lets do this again”
by CR90 “Tie Trasher” Commander

Having survived, again, another entanglement with the Galactic Empire, the Captain of the “Tie Trasher” vows to thwart the Empire in whatever way he can.

He volunteer his services to stay near a satellite cluster in order to intercept Imperial communications.

The Rebelds:

  • CR90
    • Fore Section:
      • 2 x Single Turbo Lasers
      • 1 x Gunnery Team
      • 1 x Sensor Team
    • Aft Section
      • 1 x Quad Laser Cannon
      • 1 x Engineering Team
      • Tibanna Gas Supplies
  • Wedge Antilles (Proton Torpedos, R2 Astromech)
  • 100pts Squadron

The Galactic Empire:

  • Maarek Stele, Cluster Missiles, Markmanship
  • 4 x Black Squadron;
  • 100pts Squadron

For the Rebels: Destroy All Galactic Empire Ships or flee from the Imperial ambush.

For the Galactic Empire: Destory thef CR90 or all sattelites

X-Wing: The Point of no Return – Refueling Ambush

The Rebels have emerged relatively unscathed from their initial encounter, but have provoked the ire of the Empire. While stopped at a refueling station, the CR90 is ambushed by the battered remnants of the original TIE patrol bolstered by an elite squadron led by Soontir Fel.

The situation looks bleak for the CR90’s crew until a group of Rebel fighters comes to their defense.

The CR-90 ir refuelling at the time the Black Squadrons appear. With the refuelling container still attached, and running on fume, the corvette fires up, as the station guards are launched to intercept the incoming adversaries.

The Rebelds:

  • CR90
    • Fore Section:
      • 2 x Single Turbo Lasers
      • 1 x Gunnery Team
      • 1 x Sensor Team
    • Aft Section
      • 1 x Quad Laser Cannon
      • 1 x Engineering Team
      • Tibanna Gas Supplies
  • 3 x Rookie Pilot
  • 1 x Bandit Sqn.

The Galactic Empire:

  • Soontir Fel, Push the Limit;
  • 5 x Black Squadron;
  • 1 x Storm Sqn
  • 1 x Scimitar Sqn, Concussion Missiles

For the Rebels: Destroy All Galactic Empire Ships or flee from the Imperial ambush.

For the Galactic Empire: Cripple one of CR90 sections.

…and when the black ships close in to CR90 the engines start…

The full power of the ionization reactor caught unprepared the approaching enemies, unable to dodge the mighty vessel, they crashed, harmlessly, against the hull.

The Rebels won, once again.